As I promised last week, today is the day that Kitchen Sink Stamps is releasing three wonderful new sets:
and
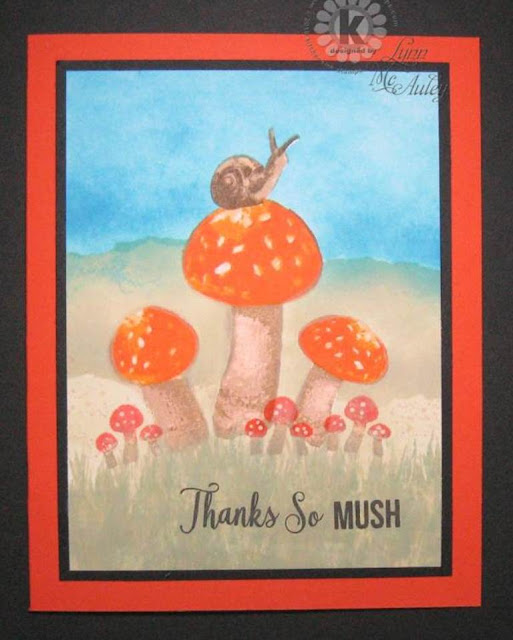
Since today is the 4th Monday of October, I have chosen one of them to feature in today's Let's Make a Scene design: Forest Toadstools Multi Step Clear Stamps. Because of the size of the toadstools and the cute snail that comes with them, I had little need to use much from any other set. The only thing on this design which is not a part of Forest Toadstools is the grass at the bottom which most of you know I pull from Honey Bunny Multi Step Clear Stamps. One great thing about the toadstool set is it includes a base stamp for each of the three large toadstools which makes joining the cap to the stem so easy when you start to stamp.
I am entering this card in the Stamping Sensations October Challenge - Shades of Autumn.
I stamped all three of the toadstool base stamps first in Memento Desert Sand.
Color Recipe for the Toadstool Stems
Layer 3 - Stampin' Up Baked Brown Sugar
Layer 2 - PTI Classic Kraft
Layer 1 - Memento Desert Sand
Color Recipe for the Caps of the Toadstools
Layer 3 - Stampin' Up Only Orange
Layer 2 - Stampin' Up Mango Melody
Layer 1 - Memento Cantaloupe
Color Recipe for the Snail
Layer 4 - Stampin' Up Soft Suede
Layer 3 - Stampin' Up Baked Brown Sugar
Layer 2 - PTI Classic Kraft
Layer 1 - PTI Fine Linen
Once these were stamped, I masked the three toadstools and the snail to brush on the background. I then added the baby toadstools and dotted them with spots of white paint. The grass was stamped last and then the sentiment added on top.
My ladybug card uses only images from the Ladybug Hugs Multi Step Clear Stamps set. I stamped the ladybug directly on my designer paper from Simple Stories: Wood and Gingham Basics by the Paper Studio.
Color Recipe for the Ladybug
Layer 1 - Memento Ladybug
Layer 2 - Memento Love Letter
Layer 3 - Memento Rhubarb Stalk
Layer 4 - Memento London Fog
Layer 5 - Memento Tuxedo Black
Layer 6 - Versafine Onyx Black
Once the ladybug was finished, I added the sentiment with Versafine Onyx Black. After attaching the stamped panel to the black and red mat, I tied a double twine bow around it and added a sunflower and die cut leaf. That was then glued to the kraft card front.
This card has been entered in the Sunny Day Crafting October 15 - November 14 Challenge - Always Add an Animal.
This final card for today features the California Quail Multi Step Clear Stamps set. I stamped it using the color recipe which Maria uses on the packaging for this set. I love the colors and wouldn't change a thing if I could! The bird was stamped on an ivory panel and then attached on top of the designer paper which is Botanical News from the Botanicabella Collection by Graphic 45. I then added a fishtail banner across the bird panel with my birthday sentiment.
This card is being entered in the October Birthday Challenge at Always Happy Birthday.


